If you’re anything like me, you probably have a jar of sourdough discard sitting in your fridge, waiting for its next delicious purpose. And while pancakes, muffins, and waffles are always great options, have you ever thought about turning your discard into homemade granola?
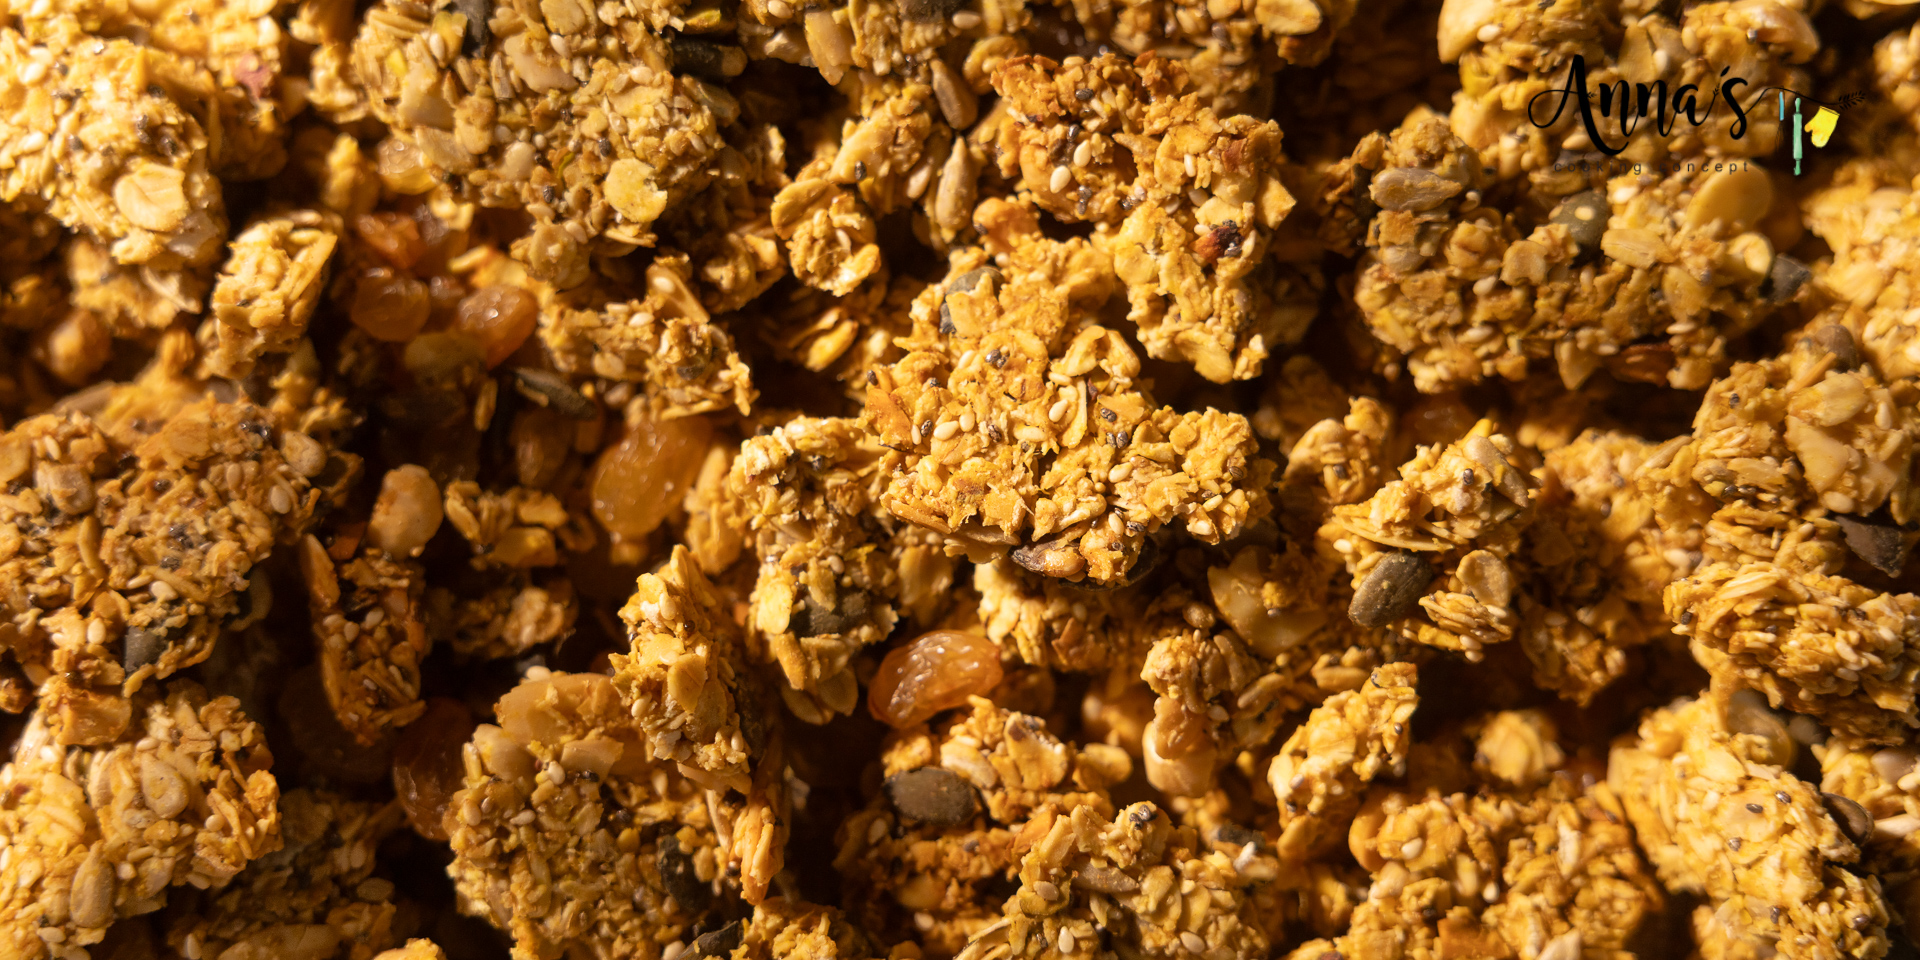
This Classic Golden Sourdough Discard Granola is crunchy, lightly sweetened with honey, packed with nuts and seeds, and flavored with warm spices like cinnamon, ginger, and a little turmeric for that beautiful golden touch.
I’ve been baking with sourdough for over six years, and one thing I’ve learned is that your starter can do so much more than make bread.
What I particularly love about this recipe is how the sourdough discard helps bring everything together into delicious crunchy clusters. Add some yogurt, fresh fruit, or simply enjoy a handful straight from the jar, and you’ve got a homemade snack that’s easy to keep on hand.
Why You’ll Love This Sourdough Discard Granola
- A delicious way to use leftover starter: No need to feed your sourdough discard before using it.
- Crunchy golden clusters: The discard, honey, and butter help bind the oats, nuts, and seeds together.
- Naturally sweetened with honey: No refined sugar is added.
- Packed with texture: Rolled oats, mixed nuts, pumpkin seeds, sunflower seeds, sesame, chia, and coconut flakes make every bite interesting.
- Warm, cozy flavors: Cinnamon, ginger, and turmeric give this granola its signature golden character.
- Perfect for meal prep: Make a batch ahead of time and enjoy it throughout the week.
What Makes Sourdough Discard Granola Different?
Traditional granola usually relies on a combination of oil or butter and a sweetener to coat the oats and help form clusters.
In this recipe, we’re adding sourdough discard to the mixture.
The discard creates a coating that helps the oats, nuts, and seeds stick together as they bake. Once the granola is thoroughly dried and cooled, you can break it into beautiful clusters.
It also adds a subtle fermented flavor that complements the sweetness of the honey and the warmth of the spices.
And no, your granola shouldn’t taste like sour bread! The flavor will depend on how mature and acidic your discard is, but the honey, nuts, and spices should remain the dominant flavors.
Can You Use Sourdough Discard Straight From the Fridge?
Absolutely!
You don’t need an active, bubbly starter for this recipe. Regular refrigerated sourdough discard works well because we’re not relying on it to make the granola rise.
Simply stir your discard before measuring it.
Use discard that has been stored safely and shows no signs of mold, unusual discoloration, or spoilage.
The Secret to Crunchy Sourdough Granola Clusters
Getting homemade granola crunchy isn’t just about the ingredients. It’s also about how you bake and cool it.
1. Press the Granola Into an Even Layer
Once you’ve mixed everything together, spread it onto your lined baking tray and gently press it down.
This helps the ingredients stick together and encourages larger clusters to form.
Try to keep the layer reasonably even so the granola bakes consistently.
2. Bake Low and Slow
For this recipe, I use 120°C with fan and bottom heat for 45 minutes.
The gentle temperature helps dry the mixture without quickly burning the honey, nuts, or coconut.
Keep in mind that ovens behave differently. Mine runs hot, so this setting works well for my oven. If your granola still feels damp after baking, it may need additional drying time.
The goal is granola that’s thoroughly dried rather than simply browned on the surface.
3. Let It Cool Completely Before Breaking It
This is one of the most important steps!
Freshly baked granola can still feel slightly soft while it’s warm. As it cools, the coating firms up and the clusters become crunchier.
Avoid breaking it apart immediately after removing it from the oven.
Let the tray cool completely, then break the granola into clusters of your preferred size.
4. Add the Raisins After Baking
I prefer adding raisins once the granola has completely cooled.
This keeps them pleasantly chewy instead of drying them out or allowing them to become overly dark in the oven.
It also creates a lovely contrast between the crunchy granola and the soft, sweet raisins.
5. Use a Good Silicone Baking Mat
One little thing that makes baking homemade granola so much easier? A good silicone baking mat!
I’ve tried different baking mats over the years, and the Silpat silicone baking mats are by far the best I’ve used.
Their nonstick surface makes spreading and pressing the granola into an even layer easier. And once the granola has completely cooled, you can lift those beautiful crunchy clusters off without them sticking to the tray.
Plus, they’re reusable, so there’s less parchment paper going to waste!
It’s one of those baking tools I genuinely love and use regularly.
Can You Customize the Nuts and Seeds?
Of course! One of the best things about homemade granola is how easy it is to make it your own.
For my version, I used roughly chopped pistachios, almonds, and hazelnuts, but you can choose your favorite combination.
Walnuts, pecans, or cashews would also work beautifully.
The same goes for the seeds. Pumpkin and sunflower seeds give the granola a lovely crunch, while sesame and chia add extra texture.
Try to keep the overall quantities similar when making substitutions so the wet mixture can coat everything evenly.
Why Add Turmeric to Granola?
Turmeric might sound like an unusual ingredient for a sweet breakfast recipe, but I love the subtle warmth and beautiful golden color it brings.
We’re only using a small amount, so it doesn’t overpower the cinnamon, ginger, or honey.
Instead, the spices work together to create a warm, lightly aromatic granola that feels especially cozy.
If you’re new to adding turmeric to sweet recipes, this is a lovely place to start.
Why Homemade Granola Can Be a Healthier Choice
One of the biggest reasons I love making granola at home is simple: I know exactly what’s going into it.
Some store-bought granolas contain large amounts of added sugar, refined syrups, or extra oils. And while there are certainly good options available, I personally prefer making my own using simple, wholesome ingredients.
With homemade granola, you’re in control. You decide how sweet it should be, which fats to use, and what goes into every batch.
For this recipe, I’ve chosen ingredients that are both delicious and nourishing:
- Rolled oats: A source of fiber, including beta-glucan, which supports healthy cholesterol levels.
- Mixed nuts and seeds: Provide healthy unsaturated fats, plant-based protein, fiber, and important minerals.
- Honey: Adds natural sweetness without needing refined sugar or commercial syrups. It’s still a form of added sugar, but you control exactly how much goes into your granola.
- Butter: Adds richness and flavor, and I know exactly how much I’m using.
- Cinnamon, ginger, and turmeric: Bring warmth, flavor, and aroma without artificial flavorings.
- Raisins: Add natural sweetness and a little chewiness, so every bite doesn’t need to rely on extra sweetener.
And of course, there’s the sourdough discard!
Sourdough fermentation can change certain components of flour, including compounds that affect mineral availability. The extent of these changes varies, so I wouldn’t claim that adding discard automatically makes granola healthier.
For me, the real benefit is combining wholesome ingredients with a practical way to reduce food waste.
Homemade doesn’t automatically mean low in calories or sugar, but it does mean you can make informed choices about the ingredients and quantities. And that’s what I love most about it: simple ingredients, no unnecessary additives, and a delicious breakfast I feel good about serving my family
My Favorite Ways to Serve Golden Sourdough Granola
This granola is delicious on its own, but here are a few ways I love enjoying it:
- With Greek yogurt: Add fresh berries, banana slices, or seasonal fruit for a satisfying breakfast.
- Over a smoothie bowl: Sprinkle a handful on top for extra crunch.
- With milk: Enjoy it like traditional breakfast cereal.
- With baked apples or pears: The cinnamon, ginger, and turmeric pair beautifully with warm fruit.
- Straight from the jar: Sometimes a handful of crunchy granola is all you need for a quick snack! that’s how my daughter loves to have it most of the time!
You can also package it in a pretty jar for a thoughtful homemade food gift.
How to Store Homemade Sourdough Discard Granola
Proper storage is essential for keeping homemade granola crunchy.
Once the granola is completely cool and crisp, transfer it to a clean, dry, airtight container or glass jar.
Store it in a cool, dry place away from direct sunlight.
For this recipe, aim to enjoy it within approximately two weeks, provided it has dried thoroughly during baking and remains crisp.
Because this granola contains sourdough discard, butter, nuts, and seeds, it’s especially important to make sure there’s no residual moisture before storing it.
If the granola becomes noticeably damp, develops an unusual smell, or shows any signs of spoilage, discard it.
In a hot or humid climate, such as Dubai, store it in the coolest dry area available and check the texture before serving.
Can I use active sourdough starter instead of discard?
Yes. You can use active starter, although there’s no need to feed it specifically for this recipe. The starter is used for its binding properties and flavor, not for leavening.
Can I use any type of oats?
Rolled oats are my preferred choice because they hold their shape and create a lovely crunchy texture. Instant oats can produce a finer, less chunky granola.
Why is my granola still soft after baking?
Granola often becomes crispier as it cools. If it’s still soft or damp once completely cool, it may need more time in the oven to dry thoroughly.
Can I replace the raisins?
Absolutely! You can try dried cranberries, chopped dried apricots, or other dried fruit. Add them after baking and cooling.
Can I make this granola without nuts?
You can replace the nuts with additional seeds, keeping the overall dry ingredient quantity similar. The texture will change slightly.
More Delicious Ways to Use Sourdough Discard
If you enjoy experimenting with sourdough discard, you might also love my Double Chocolate Sourdough Discard Muffins.
They’re soft, fluffy, and packed with chocolate, making them a completely different way to use leftover starter.
Or, if you’re in the mood for something savory, try my Japanese Sourdough Discard Pancakes, packed with vegetables and served with a delicious soy-sesame dipping sauce.
Classic Golden Sourdough Discard Granola
Ingredients
Dry Ingredients
- 300 g rolled oats
- 100 g mixed nuts of your choice I used roughly chopped pistachios, almonds, and hazelnuts
- 80 g pumpkin and sunflower seeds
- 25 g sesame seeds
- 20 g chia seeds
- 30 g coconut flakes
- 1 tsp ground cinnamon
- ½ tsp ground ginger
- ¼ tsp ground turmeric
- ½ ysp salt
Wet Ingredients
- 110 g regular sourdough discard
- 120 g honey
- 50 g butter melted
After Baking
- 60 g raisins
Instructions
- Preheat the oven: Preheat your oven to 120°C using fan and bottom heat. Line a large baking tray with parchment paper.
- Combine the dry ingredients: In a large mixing bowl, combine the rolled oats, roughly chopped mixed nuts, pumpkin and sunflower seeds, sesame seeds, chia seeds, coconut flakes, cinnamon, ginger, turmeric, and salt.
- Mix the wet ingredients: In a separate bowl, whisk together the sourdough discard, honey, and melted butter until well combined.
- Coat the granola: Pour the wet mixture over the dry ingredients and mix thoroughly until everything is evenly coated.
- Spread onto the tray: Transfer the mixture to the prepared baking tray. Spread it into an even layer, gently pressing it down with a spatula to encourage crunchy clusters.
- Bake: Bake for approximately 45 minutes at 120°C using fan and bottom heat. If baking more than one tray, switch tray positions halfway through. The granola should be golden and thoroughly dried. Baking time may vary depending on your oven and the thickness of the layer.
- Cool completely: Remove the tray from the oven and let the granola cool completely without disturbing it. It will become crunchier as it cools.
- Break into clusters: Once completely cool, gently break the granola into clusters of your preferred size.
- Add the raisins: Mix in the raisins after the granola has cooled.
- Store: Transfer the granola to a clean, dry, airtight container once completely cool and crisp.
Video
Notes
- Sourdough discard: Use regular sourdough discard directly from the refrigerator. It doesn’t need to be freshly fed.
- Mixed nuts: Choose your favorite combination. I used roughly chopped pistachios, almonds, and hazelnuts.
- Crunchy clusters: Press the granola firmly into an even layer before baking, and avoid stirring or breaking it apart until completely cooled.
- My favorite baking mat: Although parchment paper works perfectly well, I personally love using my [Silpat silicone baking mats]. Their nonstick surface makes spreading the granola and lifting the cooled clusters much easier. They’re reusable, too!
- Oven temperature: I baked this granola at 120°C using fan and bottom heat because my oven runs hot. Adjust the baking time if necessary to ensure the granola is thoroughly dried and crisp.
- Raisins: Always add them after baking and cooling to prevent them from drying out or burning.
- Storage: Store in an airtight container in a cool, dry place for up to approximately 2 weeks, provided the granola is fully dried and crisp.