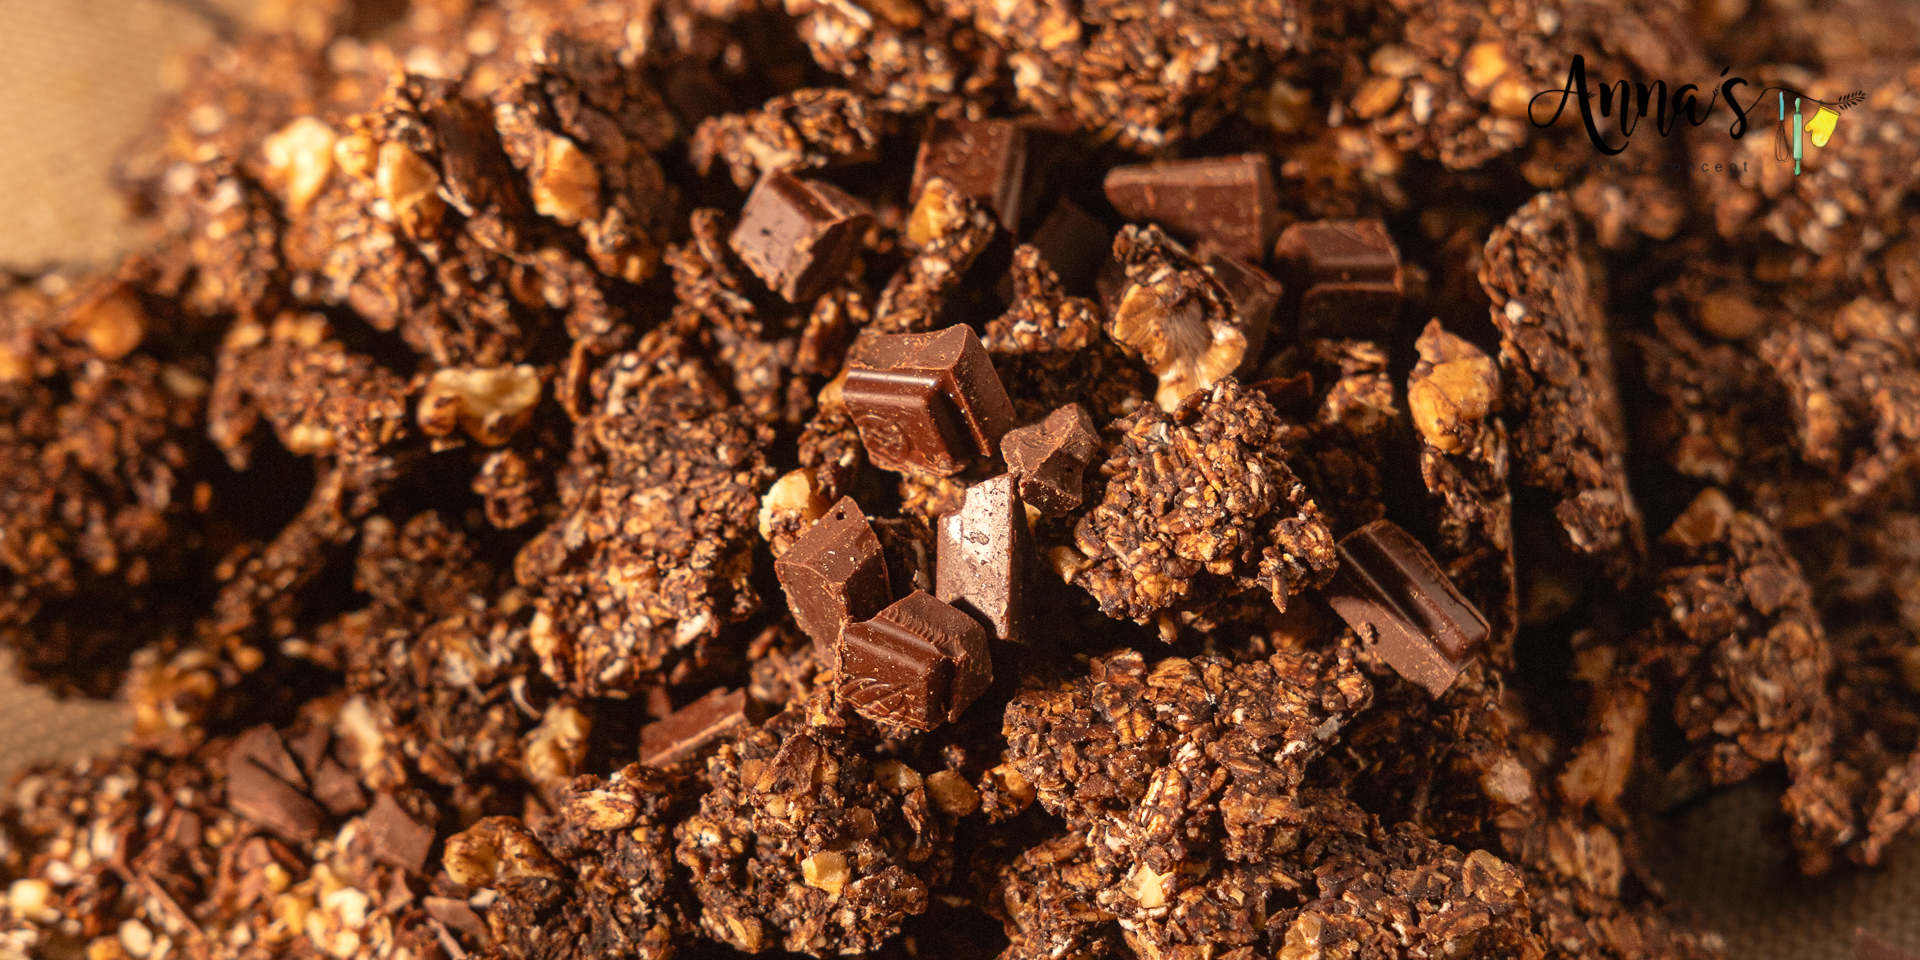
If you love chocolate for breakfast but also enjoy the deep, nutty flavors of Lebanese ingredients, this Lebanese Chocolate Sourdough Discard Granola might become your new favorite homemade breakfast!
After making my Classic Golden Sourdough Discard Granola, I wanted to create something completely different. Something richer, more chocolatey, and with a little Lebanese personality.
And that’s how this recipe came together!
Imagine big, crunchy clusters of rolled oats and walnuts coated in cocoa, chocolate sourdough discard, tahini, honey, and carob molasses, with a subtle hint of mahlab. Then, once everything is baked, we add chopped dark chocolate for an extra indulgent finish.
It’s chocolate granola, but with a delicious Middle Eastern twist!
And the best part? We’re putting that leftover sourdough discard to good use.
What Makes This Lebanese Chocolate Granola Different?
Most chocolate granola recipes rely on cocoa powder, chocolate chips, and a sweetener. Nothing wrong with that, but I wanted to bring more depth to the flavor.
Instead of simply making regular chocolate granola, I chose ingredients that remind me of Lebanese kitchens.
Tahini: The Nutty, Creamy Element
Tahini isn’t just for hummus or savory sauces!
Made from ground sesame seeds, tahini has a naturally rich, nutty flavor that pairs beautifully with chocolate.
In this granola, it also helps coat the oats and walnuts, bringing the ingredients together before baking.
The result is a chocolate granola with a subtle sesame flavor that makes it taste a little more interesting than your everyday chocolate breakfast cereal.
Carob Molasses: A Taste of Lebanon
Carob molasses, or debs el kharroub (دبس الخروب), is one of those traditional Lebanese ingredients I love finding new ways to use.
It has a deep, earthy sweetness with naturally caramel-like notes.
I use it alongside honey because I don’t want it to overpower the chocolate. Instead, it complements the cocoa and tahini, creating a beautifully rich flavor.
Mahlab: The Unexpected Little Twist
If you’ve baked traditional Lebanese sweets, you might already be familiar with mahlab.
This aromatic spice, made from ground cherry kernels, is often used in Middle Eastern baking. It has delicate almond-like and floral notes.
You won’t necessarily identify it immediately when tasting the granola, but it adds a lovely background aroma that makes the chocolate and walnuts feel even more special.
Chocolate Sourdough Discard
This is where my sourdough experiments come into the picture!
Instead of using regular sourdough discard, I’m using my chocolate sourdough discard, which already contains cocoa powder.
It brings an additional chocolate element to the recipe and gives me another delicious way to use my starter.
Don’t have chocolate sourdough discard? You can absolutely use regular sourdough discard instead. The texture and method should work similarly, although the chocolate flavor will be slightly less intense.
And remember, sourdough discard isn’t automatically a probiotic ingredient once baked. I’m using it here primarily for flavor, texture, and reducing kitchen waste.
Why You’ll Love This Homemade Chocolate Granola
There are plenty of reasons to make your own granola, especially when you enjoy preparing breakfasts ahead of time.
You control the ingredients. You know exactly how much honey, chocolate, oil, and sweetener goes into your batch.
It’s full of texture. Rolled oats and roughly chopped walnuts create a satisfying crunch, while tahini and carob molasses add richness.
It’s perfect for meal prep. Make one batch and enjoy it throughout the week with yogurt, milk, or fruit.
It’s another way to use sourdough discard. If you maintain a sourdough starter, granola is a delicious option beyond pancakes, muffins, and bread.
It has a Lebanese twist. The combination of tahini, carob molasses, and mahlab gives this chocolate granola its distinctive character.
And let’s not forget those big, crunchy clusters!
The Secret to Extra-Crispy Chocolate Granola Clusters
Making homemade granola is actually very simple. You mix the dry ingredients, combine the wet ingredients separately, coat everything together, and bake.
But after experimenting with different granola recipes, I’ve learned that a few small details make all the difference between loose, slightly soft granola and those beautiful, big, crunchy clusters.
1. Press the Granola Down Before Baking
Once you’ve spread the mixture onto your lined baking tray, press it firmly into an even layer.
This helps the oats and walnuts stick together as the granola bakes.
I usually use a spatula, but here’s a little trick I discovered!
My tip: If your spatula keeps sticking to the granola mixture, lightly coat the flat bottom of a drinking glass or flat-bottomed cup with a little oil and use it to press the mixture down.
It’s faster, easier, and gives you a beautifully even layer without everything sticking to your spatula.
Just make sure the layer isn’t too thick, so the granola can dry evenly.
2. Bake Slowly at a Low Temperature
I bake my chocolate granola at 120°C using fan and bottom heat for approximately 45 minutes.
This timing has worked consistently for me, even with my oven running a little hot.
Because this granola contains cocoa powder, it’s harder to judge doneness by color alone.
The granola might still feel a little soft when you remove it from the oven, and that’s completely normal.
Remember: granola continues to harden as it cools!
Don’t keep baking it simply because it hasn’t reached its final crunchy texture while it’s still hot. Instead, make sure it has dried sufficiently and allow it to cool before judging the crunch.
If you’re baking more than one tray, switch their positions halfway through for more even baking.
3. Don’t Touch It Until Completely Cool
This might be the hardest part!
Once the granola comes out of the oven, leave it alone.
Don’t stir it, break it apart, or transfer it to a container while it’s still warm.
Allow it to cool completely on the baking tray.
As it cools, the coating firms up and helps hold the oats and walnuts together.
Then you can gently break it into those beautiful, big clusters.
4. Use a Good Baking Surface
You can line your tray with parchment paper, as described in the recipe card.
Personally, I also love using my Silpat silicone baking mats.
They’re reusable, nonstick, and convenient when spreading and lifting homemade granola.
Why I Add the Dark Chocolate After Baking
This is one of my favorite little details.
Instead of melting the dark chocolate into the mixture before baking, I add chopped chocolate after the granola has completely cooled.
That way, the granola keeps its crunchy texture while you still get little pieces of dark chocolate throughout.
But here’s another option: If you prefer your chocolate slightly melted and coating the clusters, you can sprinkle it over the granola as soon as it comes out of the oven.
Personally, I prefer keeping those little chocolate pieces intact.
Why? Because one of my favorite ways to enjoy this granola is with warm milk!
The chocolate slowly melts into the milk, bringing out the delicious combination of cocoa, tahini, and carob molasses.
It’s almost like having a rich, chocolatey breakfast cereal, but with a Lebanese twist.
How to Store Homemade Chocolate Granola and Keep It Crunchy
After spending time making those beautiful crunchy clusters, the last thing you want is for them to become soft after a few days.
The most important rule is simple: never store granola while it’s still warm.
Even a little trapped moisture can affect its texture.
Allow the granola to cool completely and make sure it’s properly dried before transferring it to a container.
There are three ways you can store homemade granola, but they don’t all preserve the same texture.
1. At Room Temperature — My Favorite Method
Storage time: Approximately 2 weeks
For the best crunch, I prefer storing my homemade granola in a clean, dry, airtight container on the countertop, away from heat, sunlight, and humidity.
This keeps the granola ready to enjoy without any extra preparation.
My Favorite Storage Container: ZWILLING Fresh & Save
For my homemade granola, I’ve been using my ZWILLING Fresh & Save vacuum containers, and I genuinely love the results.
In my own kitchen, the granola stayed crunchy for the entire two weeks I stored it!
I love that the vacuum-sealing system helps limit exposure to air and moisture, which can affect granola’s texture.
Of course, you don’t need a vacuum container. A good airtight glass jar or food-storage container works too.
2. In the Freezer — Best for Longer Storage
Storage time: Approximately 2–3 months for best quality
If you’ve made a large batch and want to keep some for later, freezing is a practical option.
Transfer the completely cooled granola to a dry, freezer-safe airtight container or freezer bag.
I recommend dividing it into smaller portions so you don’t have to repeatedly open the entire batch.
The granola may lose a little of its original crispness after freezing and thawing, but it can still be delicious.
Let it return to room temperature while sealed before opening the container to help reduce condensation.
3. In the Refrigerator — My Least Favorite for Texture
Storage time: Approximately 3–4 weeks as a quality estimate, depending on dryness and storage conditions
You can also keep homemade granola in the refrigerator in a tightly sealed, moisture-resistant container.
However, I personally prefer countertop storage because refrigerator humidity and condensation can affect the crunch.
The flavor can still be lovely, but the clusters might not have quite the same crisp texture.
If the granola softens, you can try refreshing a portion briefly in a low oven and allowing it to cool completely again.
My recommendation: If you’re planning to enjoy the granola within two weeks, countertop storage in a properly sealed container gives you the best texture. For longer storage, I’d choose the freezer before the refrigerator.
These storage periods are practical quality estimates, not independently tested food-safety guarantees. Keep the granola dry, use clean containers, and discard it if you notice mold, moisture-related spoilage, or an unusual smell.
How to Serve Lebanese Chocolate Granola
One of my favorite things about homemade granola is how versatile it is.
With Greek Yogurt or Cottage Cheese
Spoon some plain Greek yogurt or cottage cheese into a bowl and top it with chocolate granola.
The creamy, slightly tangy base balances the rich chocolate flavor beautifully.
Add a few fresh berries or sliced bananas for a complete breakfast.
With Warm Milk — My Absolute Favorite!
This is my favorite way to enjoy this chocolate granola!
Pour warm milk over the crunchy clusters and let the little pieces of dark chocolate slowly melt.
The milk becomes deliciously chocolatey, with subtle hints of tahini and carob molasses.
It’s such a comforting breakfast, especially on cooler mornings.
Just keep in mind that warm milk will naturally soften the granola as it sits, so I like to enjoy it straight away.
With Fresh Berries
Strawberries, raspberries, or blueberries add freshness and a little acidity to balance the rich chocolate flavor.
As a Snack — My Kids’ Favorite!
My kids love grabbing a few crunchy chocolate clusters as a snack!
It’s an easy homemade treat to keep ready in the kitchen, especially when they want something sweet.
And I love knowing exactly what went into making it.
As a Dessert Topping
Try sprinkling it over Greek yogurt, vanilla ice cream, or a fruit bowl for a little extra crunch.
Frequently Asked Questions
Can I Make This Chocolate Granola Without Sourdough Discard?
Yes! You can make a version of this granola without sourdough discard.
The result will be slightly different because sourdough discard contributes moisture, flour solids, and some binding properties.
But you can try replacing it by increasing the wet ingredients already used in the recipe.
For the no-sourdough version, omit the chocolate sourdough discard and adjust the wet ingredients to:
- 120 g honey
- 30 g carob molasses
- 80 g tahini
- 50 g olive oil
Keep all the other ingredients unchanged.
Mix the wet ingredients until smooth, coat the oats and walnuts thoroughly, and follow the same baking method.
This alternative has not been separately tested, so the clusters may be a little different in texture, and the baking time may need adjusting.
Can I Use Regular Sourdough Discard Instead of Chocolate Discard?
Absolutely!
You can use regular sourdough discard instead of chocolate discard.
The granola should still work in terms of texture and preparation, although the flavor will change slightly because chocolate sourdough discard contains additional cocoa.
For a more intense chocolate flavor, I personally prefer the chocolate discard version, but regular discard is a perfectly reasonable alternative.
Can I Replace the Walnuts?
Yes! You can try other nuts, such as almonds or hazelnuts.
However, walnuts are my preferred choice for this Lebanese-inspired chocolate version because they pair so well with carob molasses, tahini, and mahlab.
Is This Granola Healthy?
This homemade granola contains rolled oats, walnuts, tahini, and olive oil, which provide fiber and unsaturated fats.
It also contains honey, carob molasses, and dark chocolate, so it’s not sugar-free or low-calorie.
For me, the advantage of making granola at home is knowing exactly what goes into it and being able to choose the ingredients and sweetness level.
Does Baking Sourdough Discard Preserve Its Probiotics?
No. Baking temperatures are too high to preserve live sourdough cultures.
The main reasons I use discard in this recipe are flavor, texture, and making good use of an ingredient that might otherwise go to waste.
How Long Does Homemade Chocolate Granola Last?
For the best crunch, I recommend storing it in an airtight container at room temperature for approximately two weeks, provided it’s completely dry.
I personally had excellent results using my ZWILLING Fresh & Save vacuum container, which kept my granola crunchy throughout those two weeks.
For longer storage, freezing in an airtight container is another option.
More Ways to Use Your Sourdough Discard
If you have a sourdough starter at home, don’t stop at granola!
You might also enjoy my other sourdough discard recipes:
- Classic Golden Sourdough Discard Granola: A lighter, warmly spiced version with mixed nuts, seeds, honey, and raisins.
- Double Chocolate Sourdough Discard Muffins: Soft, chocolatey muffins made with chocolate discard.
- Japanese Sourdough Discard Pancakes: A savory way to turn leftover starter into a delicious meal.
They’re all great examples of how versatile sourdough discard can be beyond traditional bread baking.
A Little Lebanese Twist on Chocolate Granola
I love taking familiar recipes and giving them a little twist inspired by the ingredients I grew up with.
And that’s exactly what this Lebanese Chocolate Sourdough Discard Granola is about.
It’s not a traditional Lebanese recipe, but it brings together flavors that feel familiar to me: tahini, carob molasses, walnuts, and that delicate aroma of mahlab.
Combined with cocoa, dark chocolate, and crunchy oats, they create something a little different from the usual homemade granola.
If you try this recipe, I’d love to hear what you think!
Leave a comment below, share your favorite way to enjoy it, or tag @annacookingconcept on Instagram so I can see your creations.
Happy baking! ❤️
Lebanese Chocolate Sourdough Discard Granola
Ingredients
Dry Ingredients
- 300 g rolled oats
- 120 g walnuts roughly chopped
- 20 g unsweetened cocoa powder
- ½ tsp ground mahlab
- ½ tsp sea salt
Wet Ingredients
- 110 g chocolate sourdough discard
- 85 g honey
- 25 g carob molasses
- 45 g tahini
- 25 g olive oil
After Baking
- 80 g dark chocolate roughly chopped
Instructions
- Preheat the oven: Preheat to 120°C using fan and bottom heat. Line a large baking tray with parchment paper.
- Mix the dry ingredients: In a large bowl, combine the rolled oats, roughly chopped walnuts, cocoa powder, ground mahlab, and salt.
- Whisk the wet ingredients: In a separate bowl, whisk together the chocolate sourdough discard, honey, carob molasses, tahini, and olive oil until smooth.
- Combine: Pour the wet mixture over the dry ingredients and mix thoroughly until everything is evenly coated.
- Spread and press: Transfer the mixture to the prepared baking tray. Spread into an even layer and press down firmly to encourage chunky clusters. If your spatula sticks, lightly oil the flat bottom of a glass and use it to press the mixture.
- Bake: Bake for approximately 45 minutes at 120°C, using fan and bottom heat. If baking more than one tray, switch tray positions halfway through.
- Cool completely: Remove from the oven and leave the granola undisturbed until completely cool. It will firm up and become crunchier as it cools.
- Break into clusters: Gently break the cooled granola into clusters of your preferred size.
- Add the chocolate: Fold in the chopped dark chocolate once completely cool. Alternatively, add it while the granola is still hot if you prefer slightly melted chocolate.
- Store: Transfer to a clean, dry, airtight container once completely cooled and crisp.
Video
Notes
– 30 g carob molasses (instead of 25 g)
– 80 g tahini (instead of 45 g)
– 50 g olive oil (instead of 25 g) Keep the dry ingredients exactly the same: rolled oats, walnuts, cocoa powder, mahlab, and salt. Mix the adjusted wet ingredients, coat the dry ingredients thoroughly, and follow the same baking instructions. This alternative has not yet been separately tested. The sweetness, texture, cluster size, and baking time may differ slightly from the original recipe. Regular sourdough discard: You can also use regular sourdough discard instead of chocolate discard. The texture should be similar, although the chocolate flavor will be slightly less intense. Crunchy clusters: Press the granola firmly before baking and allow it to cool completely without disturbing it. Baking surface: Parchment paper works well. I also love using reusable Silpat silicone baking mats. Oven temperature: My oven runs hot, so 120°C using fan and bottom heat for 45 minutes works well for me. Adjust according to your oven. Dark chocolate: I prefer adding it after cooling so the pieces stay intact and melt when I serve the granola with warm milk. Storage: For the best crunch, store in an airtight container at room temperature for approximately two weeks. I used my ZWILLING Fresh & Save vacuum container, and my granola stayed crunchy throughout those two weeks. For longer storage, freeze in a suitable airtight container for approximately 2–3 months for best quality. Refrigeration is possible for approximately 3–4 weeks as a quality estimate, but moisture can affect crispness. Serving suggestions: Enjoy with Greek yogurt, cottage cheese, warm milk, fresh berries, or as a crunchy snack.