
This Soft Filipino pandesal recipe came from a very specific mum problem: my Dubai-born children love pandesal, but while we are spending time in Lebanon, I could not find it anywhere.
Pandesal had become one of those familiar childhood foods for them—the kind of bread they were used to seeing in shops and enjoying warm for breakfast or as an afternoon snack in dubai. Being away from Dubai did not make them crave it any less, so I decided to make it at home.
And honestly, that is one of my favorite things about cooking. Sometimes we recreate a recipe because we miss a flavor. Other times, we make it because someone we love misses the feeling connected to it.
These soft, lightly sweet bread rolls have a fluffy center, a delicate golden crust, and the traditional breadcrumb coating that makes pandesal instantly recognizable. They require two rises, but the actual preparation is straightforward and beginner-friendly.
You do not need professional bread-making skills or complicated equipment. Just a bowl, a little patience, and a few everyday baking ingredients.
What Is Pandesal?
Pandesal is a popular Filipino bread roll traditionally served for breakfast or merienda, the Filipino afternoon snack.
Despite its name meaning “salt bread,” modern pandesal is usually slightly sweet. The rolls are soft and fluffy inside, lightly golden outside, and coated in fine breadcrumbs before baking.
They are delicious served warm with butter, cheese, jam, eggs, or coffee. My children are also perfectly happy eating them plain, especially when they are still warm from the oven.
Why You Will Love This Filipino Pandesal Recipe
This homemade pandesal is:
- Soft and fluffy in the center
- Lightly sweet and comforting
- Made with simple pantry ingredients
- Beginner-friendly
- Freezer-friendly
- Perfect for breakfast or school snacks
- Delicious with both sweet and savory fillings
It is not a five-minute recipe, but most of the time is hands-off while the dough rises.
For a busy mum, that makes it manageable. I can prepare the dough, leave it to rise, and continue with whatever else needs to be done around the house.
How Sweet Should Pandesal Be?
Pandesal is usually mildly sweet rather than dessert-like.
My first batch used ¼ cup of sugar, but it was less sweet than the bakery-style pandesal my children were used to. If you prefer a slightly sweeter, more store-bought flavor, use ⅓ cup sugar.
You can increase it to ½ cup, but keep in mind that:
- The rolls will taste noticeably sweeter.
- The dough may take a little longer to rise.
- The bread can brown more quickly in the oven.
- You may need to watch the final few minutes of baking carefully.
For this Filipino pandesal recipe, I find that ⅓ cup is the best middle ground. It adds enough sweetness without turning the rolls into sweet buns.
Ingredients You Will Need
All-Purpose Flour
All-purpose flour produces soft, tender pandesal and is easy to work with.
Bread flour can also be used. Because it contains more protein, it usually gives the bread a slightly chewier texture and a stronger structure.
You can replace the all-purpose flour with the same quantity of bread flour, but avoid adding too much extra flour while kneading. The dough should remain soft and slightly tacky.
Sugar
Sugar adds sweetness, supports browning, and helps create a tender texture.
Use:
- ¼ cup for lightly sweet pandesal
- ⅓ cup for a sweeter bakery-style flavor
- ½ cup only if you prefer distinctly sweet bread
Milk
Use lukewarm milk, not hot milk.
The milk should feel gently warm when touched. If it is too hot, it can damage the yeast and prevent the dough from rising properly.
Whole milk creates the richest flavor, but other dairy milk varieties can also work.
Egg
The egg adds richness, color, and structure to the dough.
Beat it lightly before adding it so it incorporates evenly.
Butter
Melted butter adds flavor and softness.
Allow it to cool slightly before mixing it with the milk and egg. Very hot butter may raise the temperature of the dough too much.
Margarine can also be used for a more traditional bakery-style flavor but for my kids I tend to avoid using very processed ingredients.
Instant Dry Yeast
Instant yeast can be mixed directly into the dough without activating it separately.
Always check the expiry date before using it. Old yeast is one of the most common reasons bread dough fails to rise.
Breadcrumbs
Fine, plain breadcrumbs give pandesal its traditional coating.
Avoid heavily seasoned or coarse breadcrumbs. Fine crumbs create a more even bakery-style finish.
In Lebanon i couldn’t find the traditional breadcrumbs used in the Filipino recipe but i used what we called grounded “kaak “ instead and it turn out the same.
How to Make the perfect Filipino Pandesal
1. Mix the Dry Ingredients
Mixing these ingredients first helps distribute the salt and sugar evenly throughout the dough.
2. Add the Wet Ingredients
Pour in the lukewarm milk, beaten egg, and melted butter.
Mix several times until the ingredients begin to come together. The dough will look sticky and slightly rough at this stage.
Make sure the milk and butter are only mildly warm, not hot.
3. Add the Yeast
Add the instant dry yeast and continue folding and mixing until a sticky dough forms.
Because this recipe uses instant yeast, there is no need to dissolve it in water first.
4. Knead the Dough
Transfer the dough to a lightly floured work surface.
Knead for approximately 5 to 10 minutes, or until the dough becomes smoother, elastic, and easier to handle.
The dough should feel soft and slightly tacky. Avoid continuously adding flour just because it sticks a little at the beginning.
Too much flour can make the baked pandesal dense or dry.
How Do You Know When the Dough Is Ready?
The dough is ready when it:
- Looks smoother than when you started
- Springs back slightly when pressed
- Stretches without immediately tearing
- Feels soft and elastic
You can also perform a simple windowpane test. Stretch a small piece of dough gently between your fingers. If it forms a thin membrane before tearing, the gluten has developed well.
5. Let the Dough Rise
Shape the dough into a ball and coat it lightly with oil.
Place it in a clean bowl and cover it with plastic wrap or a clean kitchen towel.
Leave it in a warm, draft-free area until it doubles in size. Depending on the room temperature, this may take approximately 45 minutes to 1½ hours.
The original timing may be as short as 30 minutes in a very warm kitchen, but it is better to watch the dough rather than the clock.
It should visibly double in volume before you continue.
6. Divide and Shape the Dough
Gently punch down the risen dough to release excess air.
Divide it into two equal portions. Roll each portion into a log, then cut each log into six pieces to make 12 pandesal rolls.
Shape each piece into a smooth ball by pulling the edges underneath and gently rolling it against the work surface.
Try to make the pieces similar in size so they bake evenly.
7. Coat with Breadcrumbs
Place the breadcrumbs in a shallow bowl or plate.
Roll each dough ball in the breadcrumbs until all sides are evenly coated.
Arrange the coated rolls on a lined baking sheet, leaving at least some space between them.
8. Let the Pandesal Rise Again
Cover the shaped rolls loosely and leave them to rise for a second time until noticeably puffy and close to doubled in size.
This normally takes around 30 to 60 minutes, depending on the temperature of your kitchen.
Do not skip the second rise. It is important for achieving the soft, airy texture associated with good pandesal.
9. Bake Until Lightly Golden
While the rolls are completing their second rise, preheat the oven to 180°C
Bake the pandesal for approximately 15 minutes, or until the tops and sides are lightly golden.
Avoid overbaking them. Pandesal should remain pale golden rather than deeply browned.
Remove the rolls from the oven and serve them warm.
Tips for Soft and Fluffy Pandesal
Do Not Add Too Much Flour
A soft, slightly tacky dough produces softer bread.Add only enough flour to make kneading manageable. A heavily floured dough may feel easier to shape, but the baked rolls can become dry.
Measure the Flour Carefully
For the most reliable result, weigh the flour using a kitchen scale. If measuring with cups, fluff the flour first, spoon it gently into the measuring cup, and level the top. Scooping directly from the bag can pack too much flour into the cup.
Let the Dough Rise Fully
Bread-rise timings are always approximate. A warm kitchen speeds up fermentation, while a cold kitchen slows it down. Look for the dough to double rather than relying only on a timer.
Keep the Dough Warm
Place the covered bowl in a warm, draft-free area. A switched-off oven with the light turned on can work well, but make sure the oven is not hot.
Avoid Overbaking
Overbaked pandesal loses its soft texture quickly. Begin checking the rolls around the 13-minute mark. They should be lightly golden on the sides and cooked through, but still soft.
Serve Them Warm
Pandesal is especially good shortly after baking, when the inside is soft and the crust is still delicate. If serving later, warm the rolls briefly before eating.
Can I Make Pandesal With a Stand Mixer?
Yes. While this recipe is traditionally mixed and kneaded by hand, you can absolutely use a stand mixer instead. A stand mixer fitted with a dough hook makes the process easier and less hands-on. Simply add the ingredients to the bowl and knead on low to medium-low speed until the dough becomes smooth, elastic, and slightly tacky. If you prefer a more traditional approach, the dough can still be mixed and kneaded entirely by hand.
What to Serve with Pandesal
Fresh pandesal works with both sweet and savory fillings.
Try serving it with:
- Salted butter
- Cheese
- Peanut butter
- Jam
- Chocolate spread
- Scrambled eggs (my kids favorite!)
- Omelets
- Chicken or tuna filling
- Coffee, tea, or warm milk
For children, warm pandesal with butter and egg or cheese makes a simple breakfast or lunchbox addition.
How to Store Homemade Pandesal
Allow the rolls to cool completely before storing them. Place them in an airtight container or sealed bag at room temperature for up to 2 days. Because homemade bread does not contain the preservatives found in many store-bought breads, it can dry out more quickly. Warm the rolls for a few seconds in the microwave or briefly in the oven before serving.
Can You Freeze Pandesal?
Yes. Pandesal freezes very well. Once completely cool:
- Place the rolls in a freezer-safe bag.
- Remove as much air as possible.
- Freeze for up to 2 months.
- Thaw at room temperature.
- Reheat briefly before serving.
Freezing the rolls while they are still fresh helps preserve their soft texture. For busy mornings, I like having a batch ready in the freezer. You can remove only the number you need and warm them before breakfast.
Frequently Asked Questions
Why Is My Pandesal Dense?
Dense pandesal is usually caused by:
- Adding too much flour
- Not kneading the dough enough
- Using expired yeast
- Not allowing the dough to rise fully
- Using liquid that was too hot
- Overbaking the rolls
Keep the dough soft and give it enough time to double during both rises.
Why Did My Dough Not Rise?
First, check whether your yeast is fresh. The dough may also rise slowly if the room is cold. Move it to a warmer location and give it more time. If the milk was very hot, it may have damaged the yeast.
Can I Use Active Dry Yeast?
Yes, but active dry yeast should usually be dissolved first. Mix it with the lukewarm milk and a small pinch of the sugar. Leave it for approximately 5 to 10 minutes, until foamy, before adding the remaining ingredients.
Can I Make the Pandesal Sweeter?
Yes. Use ⅓ cup sugar for a gently sweeter bakery-style result. You can use up to ½ cup, but expect a sweeter bread and potentially a slightly longer rising time.
Why Are Breadcrumbs Used on Pandesal?
Breadcrumbs give pandesal its traditional dry, textured coating and help distinguish it from ordinary dinner rolls.
Use plain, fine breadcrumbs for the most authentic finish. or use Grounded “Kaak” like I did
This homemade pandesal may begin as a practical solution to a breakfast craving, but the smell of freshly baked bread makes it feel much more special.
Serve the rolls warm, let everyone choose their favorite filling, and do not be surprised when the first batch disappears faster than expected.
if you like this recipe make sure my other similar recipes
For another lightly sweet bread recipe, try my aromatic sweet date brioche Maarouk, a soft and comforting bake with Middle Eastern flavors.
For another easy make-ahead breakfast for children, try my air-fryer oatmeal breakfast muffins, which are also perfect for busy mornings.
For more homemade breakfast inspiration, try my sourdough waffles or explore my collection of easy breakfast and brunch recipes.
also If you love having breakfast ready ahead of time, my Very Berry Baked Oatmeal is another practical make-ahead recipe for busy family mornings.
For another savory bake that works well for brunch, lunchboxes, or entertaining, try my Savory Date and Parmesan Mini Bundt Cakes.
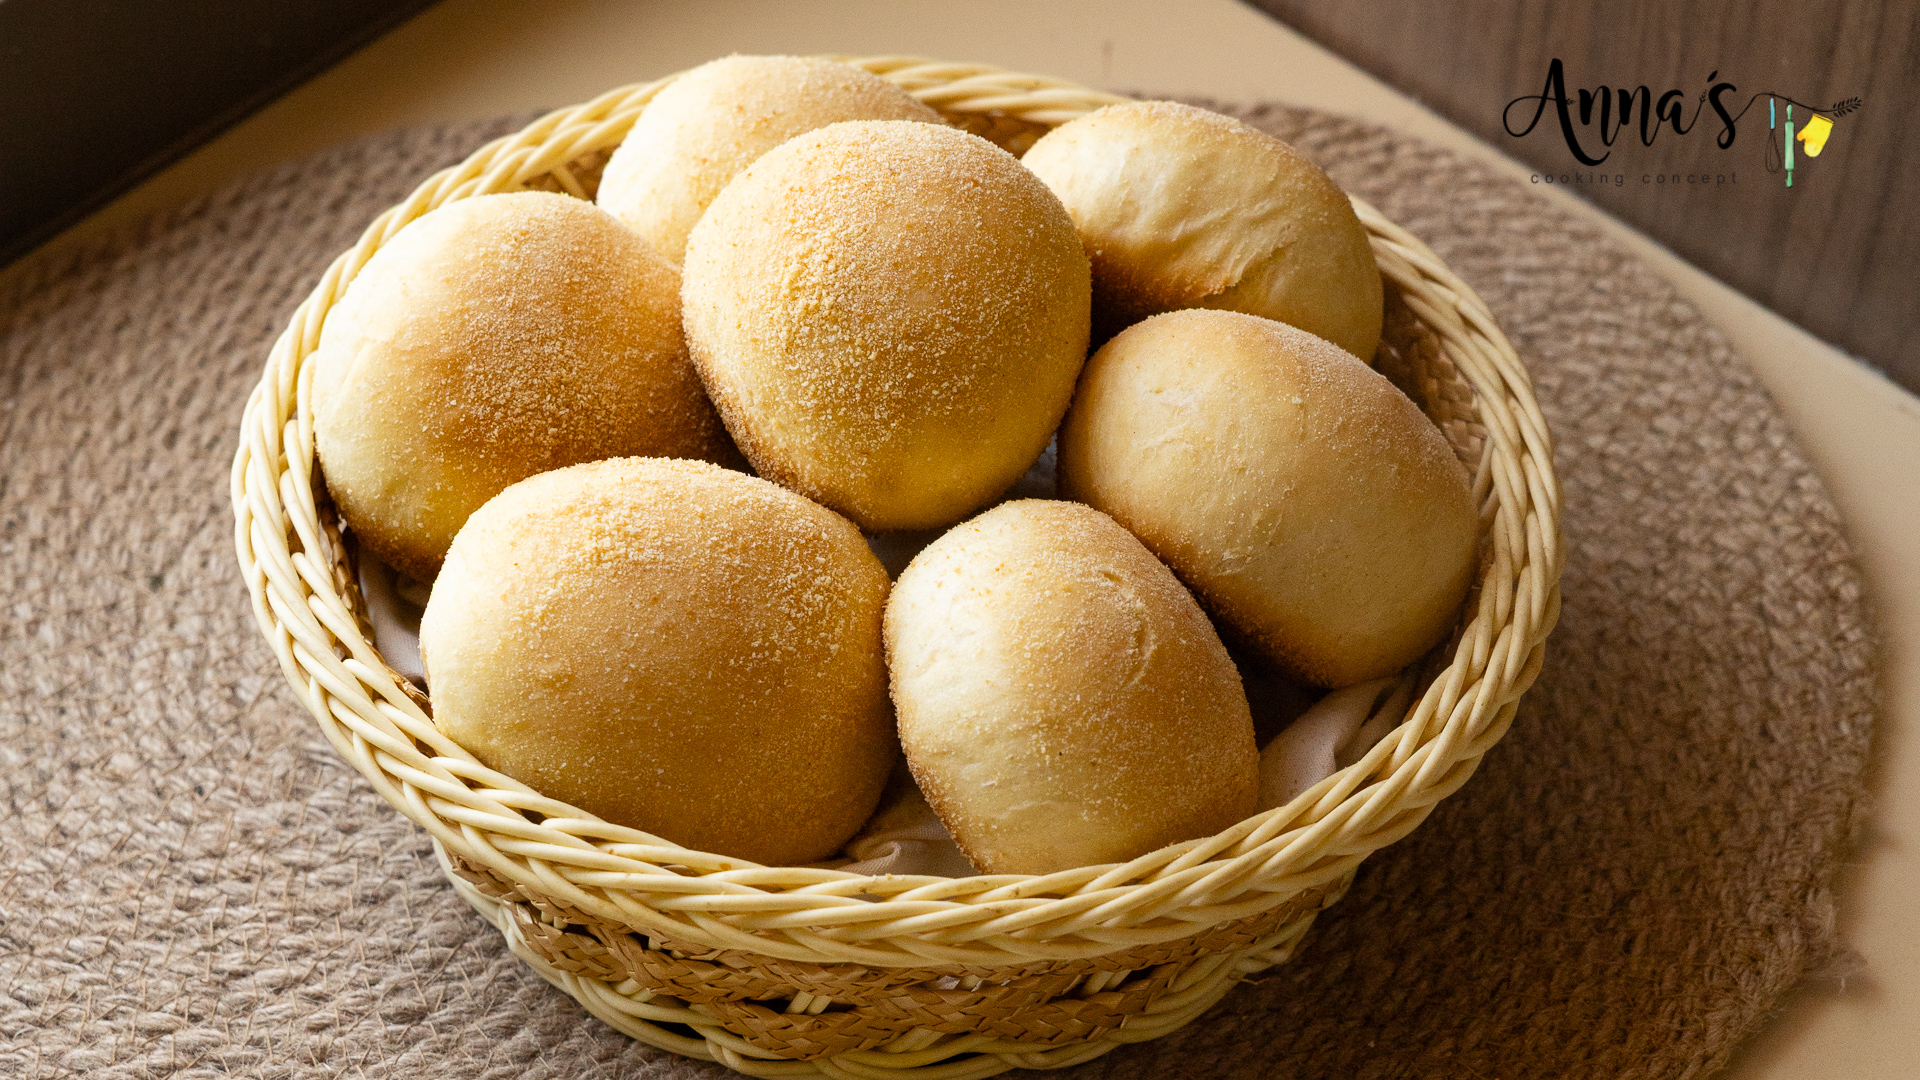
Soft Filipino Pandesal
Equipment
- Large mixing bowl
- * Measuring cups and spoons
- * Whisk or fork
- * Dough scraper or knife
- * Baking tray
- * Baking paper
- * Clean kitchen towel or plastic wrap
Ingredients
- 3 cups all-purpose flour plus a little extra for kneading
- ⅓ cup granulated sugar
- 1 tsp salt
- 1 cup milk lukewarm
- 1 large egg lightly beaten
- 4 tbsp unsalted butter melted and slightly cooled
- 1½ tsp instant dry yeast
- ½ cup fine plain breadcrumbs or grounded kaak
- 1 tsp olive oil for coating the bowl
Instructions
- In a large mixing bowl, combine the flour, sugar, and salt.
- Pour in the lukewarm milk, beaten egg, and melted butter. Mix until the ingredients are mostly combined.
- Add the instant dry yeast and continue mixing until a sticky dough forms.
- Transfer the dough to a lightly floured surface. Knead for 5 to 10 minutes, until the dough becomes smooth, soft, and elastic. Add only a small amount of extra flour if needed.
- Shape the dough into a ball and lightly coat it with oil. Place it in a clean bowl and cover with plastic wrap or a kitchen towel.
- Leave the dough in a warm place for 45 to 90 minutes, or until doubled in size.
- Gently punch down the dough. Divide it into two equal portions and roll each portion into a log.
- Cut each log into six equal pieces to make 12 rolls.
- Shape each piece into a smooth ball.
- Place the breadcrumbs in a shallow bowl. Roll each dough ball in the breadcrumbs until evenly coated on all sides.
- Arrange the rolls on a lined baking tray, leaving at least 1 inch of space between them.
- Cover loosely and leave to rise for another 30 to 60 minutes, or until visibly puffy and nearly doubled in size.
- Meanwhile, preheat the oven to 180°C
- Bake for 13 to 15 minutes, or until the sides and tops are lightly golden.
- Remove from the oven and serve warm.
Video
Notes
- Ingredients:
- Do Not Add Too Much Flour: The dough may feel sticky at first, but it will become smoother as you knead.
- Rising Time: Rising times depend on the temperature of your kitchen.
- Breadcrumbs: Use fine, plain breadcrumbs rather than seasoned or coarse breadcrumbs for the traditional pandesal coating.
- Storage:
- Freezing:
- Serving Suggestions:
* Cheese
* Jam
* Peanut butter
* Chocolate spread
* Scrambled eggs
* Tea, coffee, or warm milk